
In this tough time of lock down, it is really impossible and tough to order pizza from outside considering the health and safety. What if I say that pizza can be made easily at home without even an oven. Yes!!!!! This pizza turned out super amazing and soft with all the favorite toppings. Trust me... This was as good as any dominoes or Pizza hut Pizza and yet pocket friendly. This is made with homemade pizza and pasta sauce which is also super easy to make. Homemade is always bliss and gives you the best satisfaction one can ever get. In this recipe, I have used roasted garlic powder,parsley and oregano for a additional flavor to make the base. You can very well skip it if you want the base to be plain. But trust me, this adds lovely flavor to the crust.

Serves: 2 Pizzas


2. Roll it into a flat round shape as shown in the picture. I have not created a dent in my recipe, however you can create a dent so that it resembles of Restaurant Pizza. Prick the pizza base with forks as shown below. This helps the base to be cooked uniformly and inside as the steam is circulated through the holes.

3. Place the pizza base on a non stick pan. I made a mistake of using a cast iron pan and the base got slightly hard. However, non stick gives a perfect finish.
4. After placing the base on non stick pan, apply pizza sauce generously.

5. Add all your favorite toppings uniformly. I have just added it randomly as it was just me and my husband who are gonna eat it:P This was a tip from my friend, ensure all 4 slices have all the toppings distributed equally so that everybody gets a bite of all the toppings. So start placing the toppings equally and uniformly so that when you cut them into 4 slices, it is divided equally and NOT like this one:)

6. Add lavish amount of mozzarella cheese cubes (grated or cubed) over the pizza along with some oregano, Italian herbs and red chili flakes sprinkled as per taste. Sooooo Cheeesy!!! and cover it with a lid. Allow the pan to simmer (full low flame) for 8 mins.

7. After 8 mins, remove the pizza from the pan and transfer to plate :):) Slice it and enjoy this simple Pan to Plate Pizza that is yummy and Cheesyyyyy !!!
8. You can also pre - cook the base alone as mentioned in the above step. Do not flip it. Cook by covering the lid on one side on low flame for 8 mins. After it cools down, store in Zip lock covers.
9. Add the pizza sauce, toppings,cheese and microwave it until the cheese melts. Serve it hot :) So Easy :)


Serves: 2 Pizzas
Ingredients
For the Dough
- All purpose Flour - 2 cups
- Curd/Yogurt - 1/4 cup
- Baking Powder - 1/2 tsp
- Baking Soda - 1/4 tsp
- Salt - 1/2 tsp
- Oil - 2 tbsp (Vegetable or olive oil)
- Roasted Garlic Powder - 2 tsp (Optional)
- Parsley - 1 tsp
- Oregano - 1 tsp
- Water - 3/4 cup
- Sugar - 1 tsp
For the Toppings
- Homemade Pizza and Pasta Sauce - As needed to spread
- Mozzarella Cheese - cubed or grated ( 1.5 cups )
- Red chili powder / Paprika powder/ Red chili flakes- 1 tsp for each pizza(as per taste)
- Oregano seasoning/ Mixed Italian Seasoning - as per taste
- Veggies of your choice - Jalapenos,Baby corn,Olives,Tomatoes,capsicum,corn,onion (as show in the picture)

Method
1. Add the dry ingredients and wet ingredients mentioned under the "Dough" and combine well. Knead nicely for 5 mins into a pliable soft dough. The real trick lies in the kneading for pizza to come out really soft. Sieve the flour, baking powder and soda to get rid of any particles so that the dough is smooth. Cover with a moist cloth and keep it aside for about an hour.
2. Roll it into a flat round shape as shown in the picture. I have not created a dent in my recipe, however you can create a dent so that it resembles of Restaurant Pizza. Prick the pizza base with forks as shown below. This helps the base to be cooked uniformly and inside as the steam is circulated through the holes.
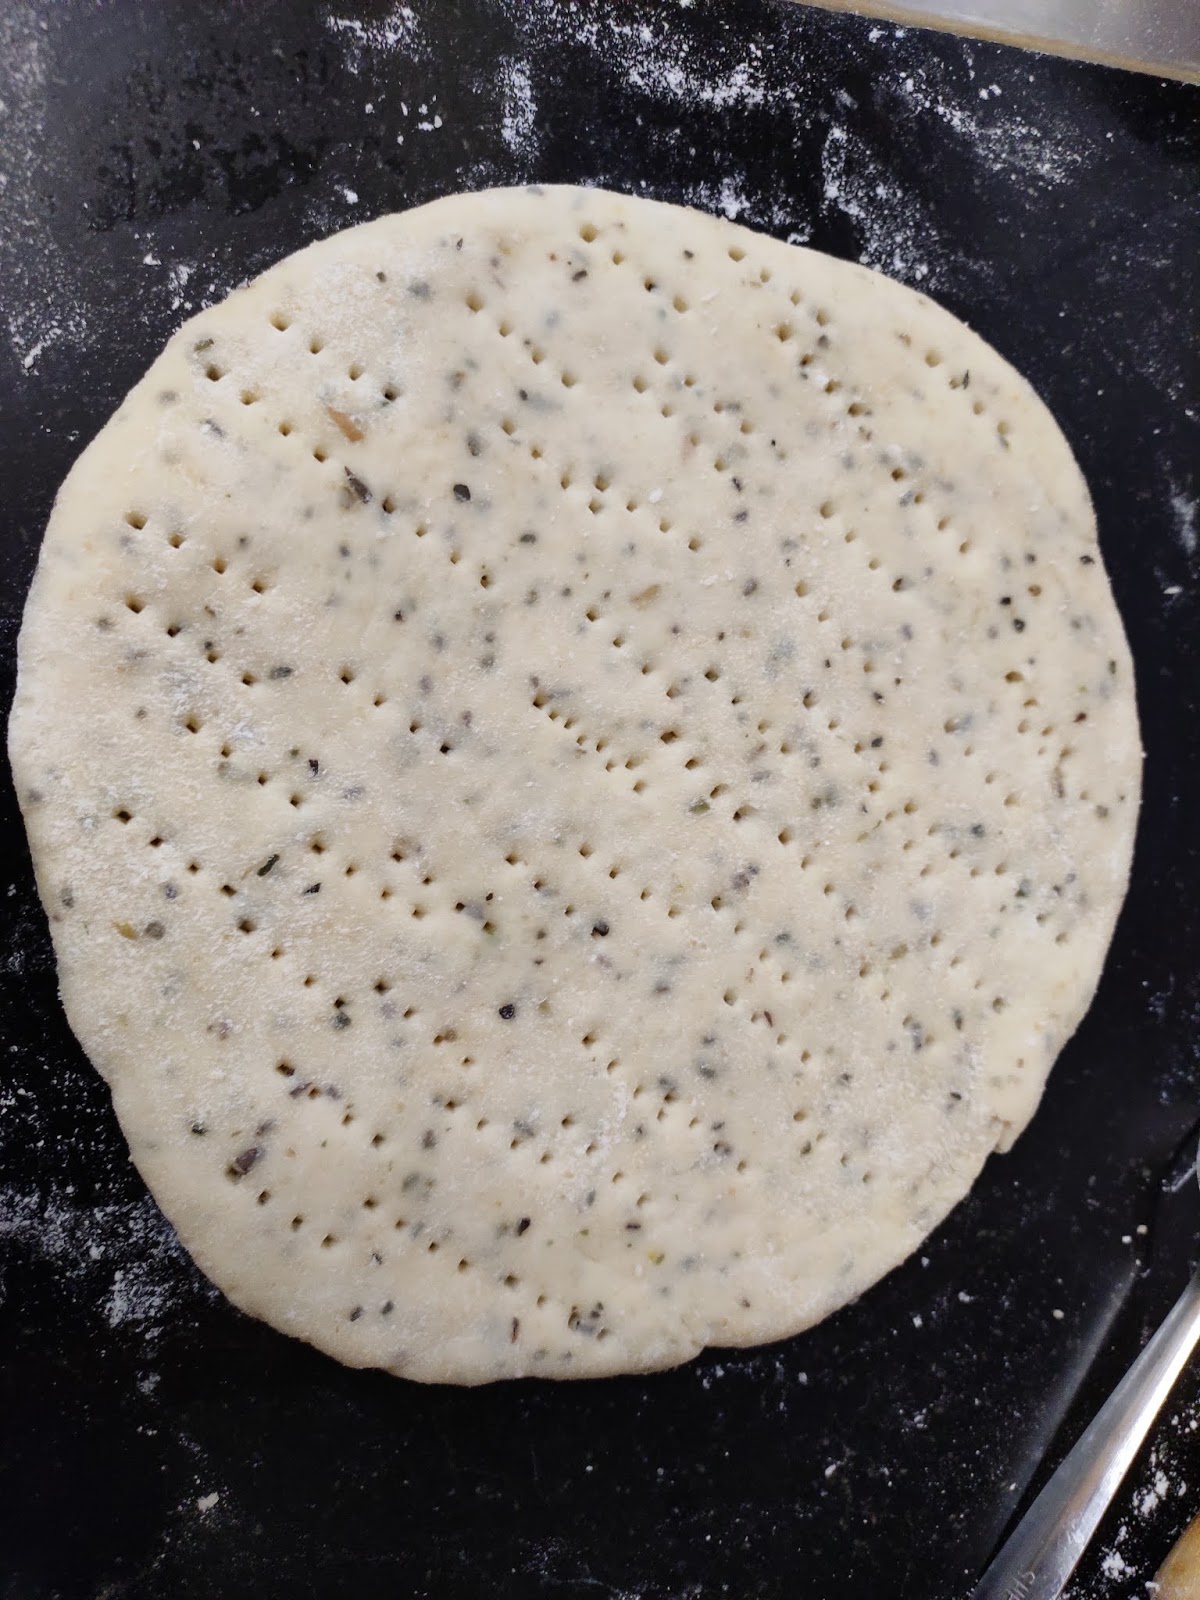
3. Place the pizza base on a non stick pan. I made a mistake of using a cast iron pan and the base got slightly hard. However, non stick gives a perfect finish.
 |
| Base made by cooking on a non stick pan |
4. After placing the base on non stick pan, apply pizza sauce generously.

5. Add all your favorite toppings uniformly. I have just added it randomly as it was just me and my husband who are gonna eat it:P This was a tip from my friend, ensure all 4 slices have all the toppings distributed equally so that everybody gets a bite of all the toppings. So start placing the toppings equally and uniformly so that when you cut them into 4 slices, it is divided equally and NOT like this one:)


8. You can also pre - cook the base alone as mentioned in the above step. Do not flip it. Cook by covering the lid on one side on low flame for 8 mins. After it cools down, store in Zip lock covers.
9. Add the pizza sauce, toppings,cheese and microwave it until the cheese melts. Serve it hot :) So Easy :)
 |
| Pre Cooking the base in advance |


